Showing posts with label software. Show all posts

Picasa Tutorials

2007-07-30

After writing many short tutorials and demos on using Picasa 2, it is about time to gather those links for a sitemap of Picasa tutorials.

This blog post is to be updated frequently. Please drop me a comment if there is a certain topic that you like to see along with these short tutorials.
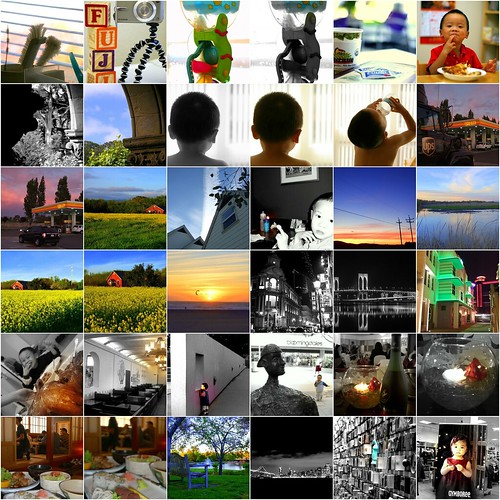


1. IMGP2204, 2. IMGP2152, 3. IMGP2020, 4. IMGP2019, 5. Blown Highlight in Picasa, 6. IMGP1527, 7. IMGP1357, 8. IMGP1354, 9. Not easy to be me, 10. IMGP1064, 11. IMGP1063, 12. UPS & Shell, 13. Pretty Sky, 14. Pretty Sky & Barn House, 15. Home & Blue Sky, 16. DSCF0909, 17. DSCF0896, 18. DSCF0885, 19. DSCF0863, 20. DSCF0857, 21. DSCF0786, 22. Macau Post Office b&w, 23. DSCF0584 in b&w, 24. DSCF0570, 25. P1010012, 26. Mission Blvd McDonald, 27. Looking, 28. bloomingdales, 29. Picasa Focal B&W, 30. Picasa Focal B&W, 31. CIMG3275, 32. CIMG3274, 33. Saturated Bench, 34. sf_bay_bridge, 35. SF Airport Art, 36. CIMG3359


Introduction

Basic Editing

Tuning & Effects

Picasa 'I am feeling lucky'

2007-07-24


On a rush, I sometimes use the quick fix with "I am feeling lucky" in Picasa. Other times, I use "auto contrast" and "auto color" with pictures from my Fuji F30. I find "I am feeling lucky", "auto contrast/color" working quite effectively with "lighting" tunning afterwards. I use these features in Picasa to perform quick fix to most of my shots in Fuji F30. I usually zoom in to 100% crop to view the change and alternate between these three basic fixes
  • I am feeling lucky
  • Auto Contrast
  • Auto Color
and "ligting" is adjusted after the basic fix in Tunning section of Picasa. If I am not satisfied with the basic and tunning fixes, I proceed to "Effects" for these two items for color pictures:
  • Sharpen (just one click)
  • Saturation (only when necessary)
The above are few samples of quick fixes that I did in few minutes on candid shots with my Fuji F30. I may ruin the sky color as I have a tendency of overdoing color saturation.

Related Post:

Using SUPER on Fuji f30 video

2007-01-03
I have learned it from dpreview fuji forum members on a great tool in converting compressed avi video to mpeg4 and other variants as in flash video in FLV. This is a great tool worth looking into for compressing AVI videos to formats with various codecs. It is not intuitive especially in the beginning. But the encoding is way fast in SUPER!
The download page is buried in few pages after the main page and it is in this link as of the writing of this post
With h.264 codec that comes with super program, I manage to compress the 55 second avi video file recorded from Fuji f30 in motion jpeg from 61Mb to about 9.4Mb
  • input/original
    • avi video from Fuji f30
    • 61 Mb
    • 55 seconds in length
    • motion jpeq
  • output #1 in SUPER using mpeg4
    • mpeq4
    • 9.4Mb
    • h.264 codec encoding
  • output #2 in SUPER using FLV
    • Flash Video in FLV
    • 8.9 Mb
    • h.263 codec in FLV/SWF

And the encoding takes about 3 minutes in my 3 year old Dell desktop. Without much analysis, let me put up some samples of uploaded videos to Photobucket

Original Video:

Unprocessed video uploaded to photobucket.


MPEG4
I used SUPER to convert the avi video to mpeg4 using h.264 codec before upload. The reduction in size from 61Mb to 9.4Mb does save me the time in uploading from roughly 22 minutes to about 6 minutes. And photobucket goes through the same step in converting the final video to FLV. I find the output pretty acceptable comparing to the original avi without processing.


FLV
I used SUPER to convert the same avi video to FLV before uploading to Photobucket. The reduction in size from 61Mb to 8.9Mb helps in the upload time to photobucket but Photobucket still takes a fraction of time in the final stage of converting the video to its FLV. At first, I thought that converting to FLV will save the photobucket last step of conversion to FLV and it does not seem to skip that last extra step. Also the FLV from SUPER can only be played in browser without navigation controls of a vidoe player such as Quicktime or Windows Media Player


Resources:

Related:


Autostitch

2006-10-10

I find autostitch to be very useful as a free software program for autostitching mutliple pictures that give you a wide angle view. My pano picture of my boring cube is currently the most viewed pictures in my Most Viewed pictures in Flickr. It has been viewed over 800+ times and still counting. The important things to remember in using autostitch with Casio ex-z750:
  • Enable the 'grid' menu that helps you to align pictures
  • Take pictures above and below a spot -- this is important.
  • Avoid contrasty areas that will confuse the program in stitching process
  • Experiment with a short series
  • Have a stable plaform such as using a tripod. The above pano picture was taken in a chair turning from right to left

Related:


Picasa

2006-10-02
It is free
I find Picasa very useful in organizing photos and it provides a very complete suite of basic editing tools. Picasa consists of three sections for photo editing:
  • Basic Editing
  • Tuning
  • Effects
And I highly recommend the tool.

Basic Editing
The basic features are very useful for red eye correction, cropping, straighten and simple adjustment to lighting, contrast and color. I never thought of 'straighten' until I try it on few pictures and I learn that a perspective can be created with an adjusted angle and more often than not, we don't line up the camera straight and Picasa can come in very handy.

Tuning
The next suite of tool set comes into the 'Tuning' section that is more of a life saver especially for 'Fill light' when my pictures are purposely taken in the dark without the flash. I went wild in a series of pictures taken in the mall knowing that the small flash in a point & shoot will definietly ruins a picture with not enough light for the dark background. I have a very bad picture that is out of focus and very shaky due to long shutter speed and a lot of distractions that the picture is close to be placed in my trash folder but Picasa comes in for the rescue. Though it is still a bad picture, I can salvage it for blogging with a black and white tuning with high saturation for a contrasty look.

Effects
The third editing section in Picasa is the superb special effects -- it is plain sweet for a tool that is free and yet it is so rich in features from basic editing to some special effects that add
variations -- be it on a good or bad picture. The original picture on the Gymboree poster is not too bad but it is boring to take picture on someone else's great photographic work -- I don't want to clone on other's work and hence I change it the way I want it. It may not come out nicely as the original but that is not the purpose as I want it to be different and Picasa 'Effects' allow that with 'Focal B&W' and I am pretty happy with the alternation.

For comparison with the original pictures, I have the photoset for Picasa Review uploaded in Flickr. Please write me a comment if you are interested in seeing a more thorough tutorial on Picasa.

Recommended Site on Picasa
Follow up
 

About

Welcome to Hin's Photo Corner, this is my learning blog on photography, blogging and advertising. And I hope you enjoy your visit. For contact, please comment in blog post or email me directly hintheman at gmail.com.


B&H Best Deals

Statcounter